Processing Algorithms
Model Baker offers a powerful set of algorithms to process ili2db jobs. Furthermore, there are some utility algorithms, like creating baskets or getting the database parameters from a layer.
This chapter describes the general working principles of the Model Baker algorithms, explains each one individually and shows a practical processing model example using the QGIS Model Designer.
General
While many QGIS algorithms offer complex widgets to set configurations, Model Baker algorithms provide a straightforward list of string parameters. Sometimes these are convenienced by enumerations, file managers or checkboxes, but mostly they are free text. This lets you use the individual algorithms very flexibly in graphical model workflows.
The algorithms use the Model Baker Library in the backend. They offer the same options and behaviors as Model Baker does as a plugin. In addition, general configurations like custom model directories are concerned and can be adjusted through the global Model Baker settings.
There are three types of algorithms: the ili2db job algorithms, the database algorithms and the utils to be used in the QGIS Model Designer.
Algorithms
ili2db Algorithms
Found in group Model Baker > ili2db
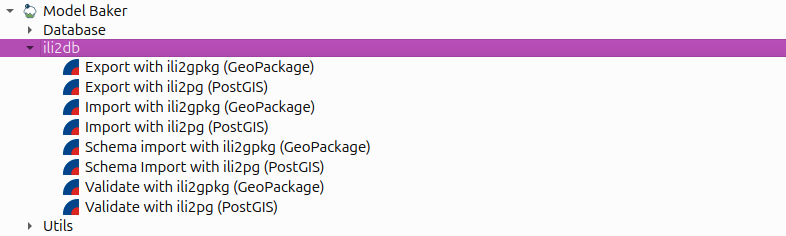
Import INTERLIS models with ili2db
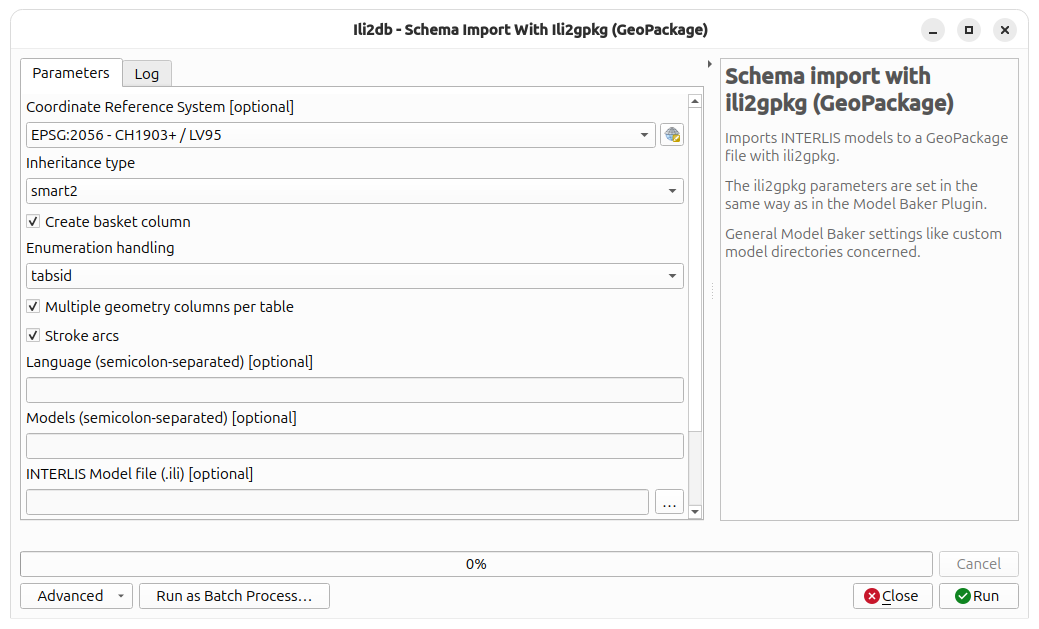
The settings are the same as those that can be set among other places in the Advanced Options in the wizard.
Imports data with ili2pg
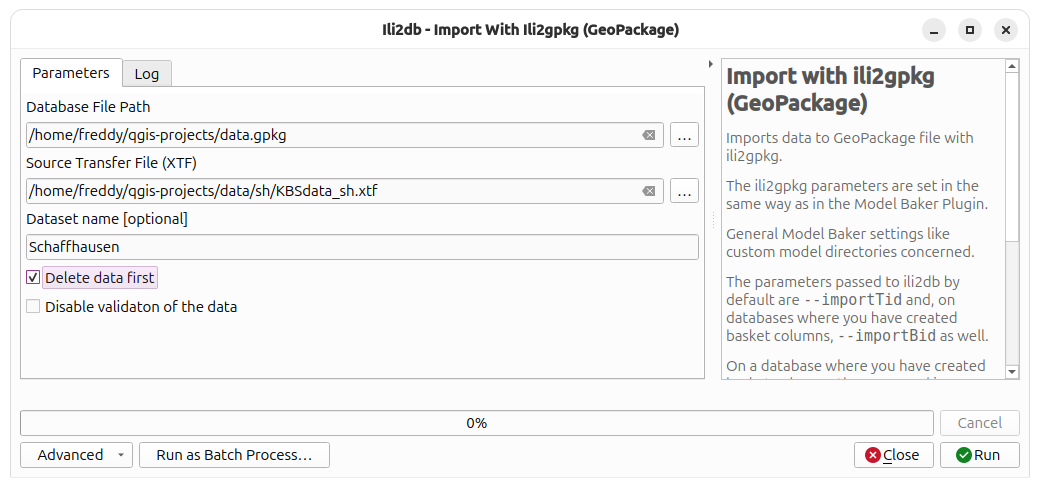
The parameters passed to ili2db by default are --importTid and, on databases where you have created basket columns, --importBid as well. On a database where you have created basket columns, the command is --update (or --replace when you choose to delete data first). You also need to define a dataset name for the import on such databases.
Export data with ili2db
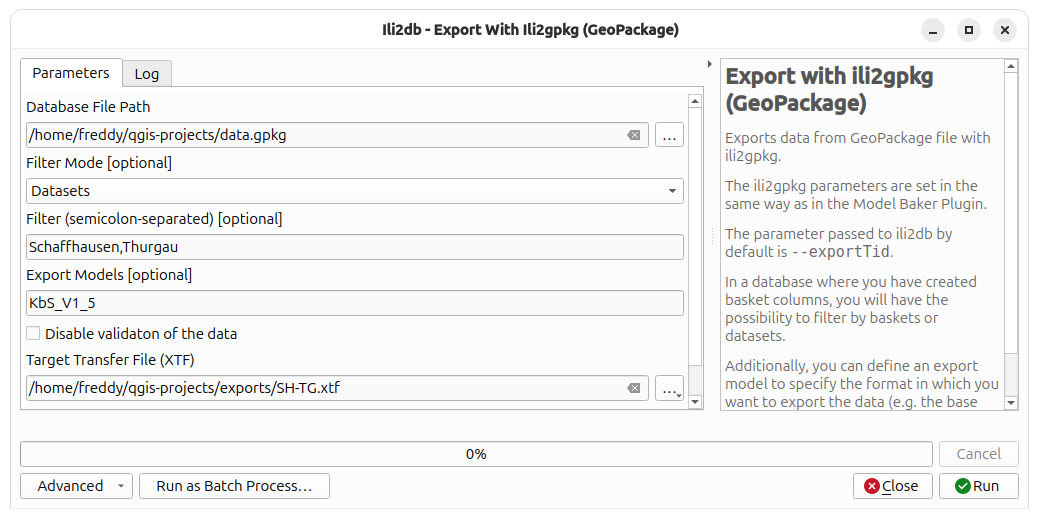
The parameter passed to ili2db by default is --exportTid. In a database where you have created basket columns, you will be able to filter by baskets or datasets. You can also define an export model to specify the format in which you want to export the data (e.g. the base model of your extended model).
Validate database with ili2db
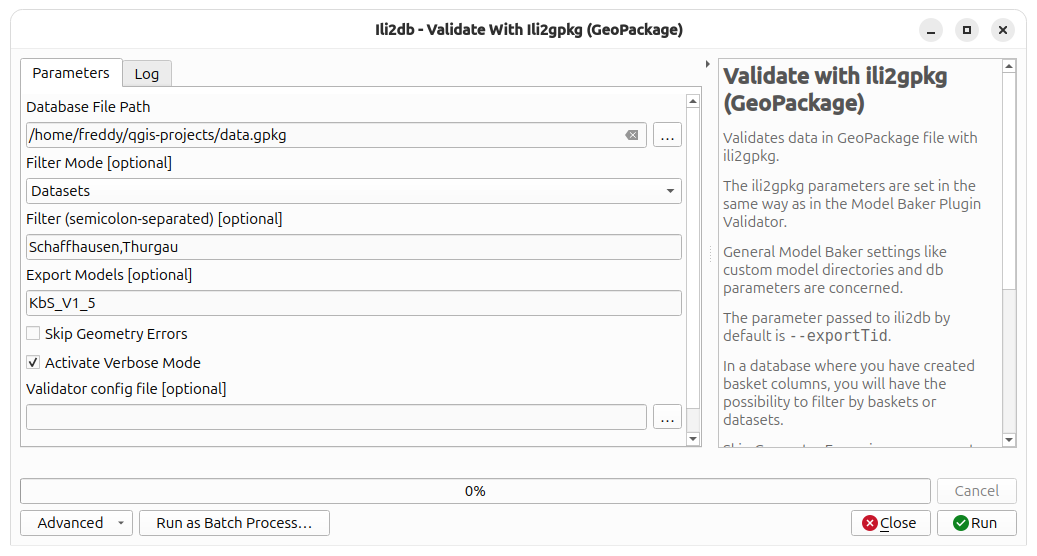
The parameter passed to ili2db by default is --exportTid. In a database where you have created basket columns, you will be able to filter by baskets or datasets. Skip Geometry Errors ignores geometry errors (--skipGeometryErrors) and AREA topology validation (--disableAreaValidation) and the verbose mode provides you more information in the log output. You can also define an export model to specify the format in which you want to validate the data (e.g. the base model of your extended model). You can also add a validator config file to control the validation.
This algorithm returns a path to the resulting XTF file, which you can use to analyze your validation feedback.
Database Algorithms
Found in group Model Baker > Database

Create Baskets
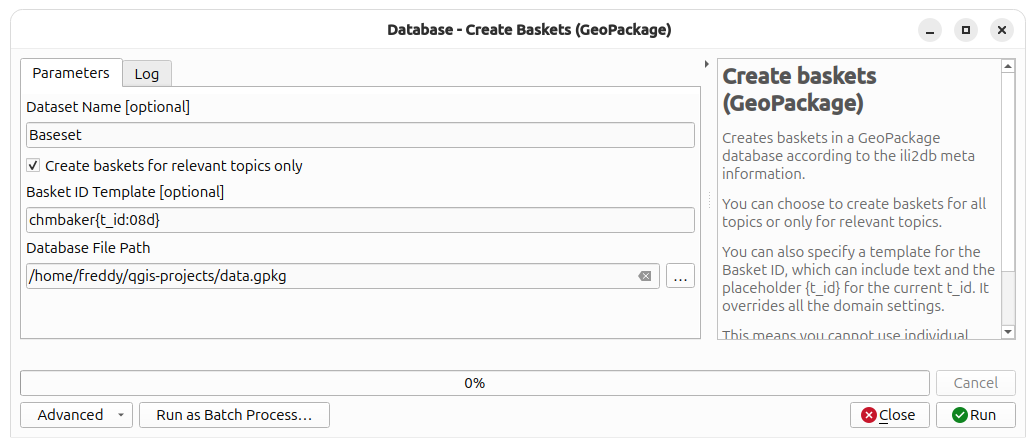
Creates baskets in a database according to the ili2db meta information. You can choose to create baskets for all topics or only for relevant topics. You can also specify a template for the Basket ID, which can include text and the placeholder {t_id} for the current t_id. It overrides all the domain settings. This means you cannot use individual templates for different topics, but you can use the same template for all topics.
Utils
Found in group Model Baker > Utils

These parameters are used for processing models in the QGIS Model Designer.
Get parameters from layersource
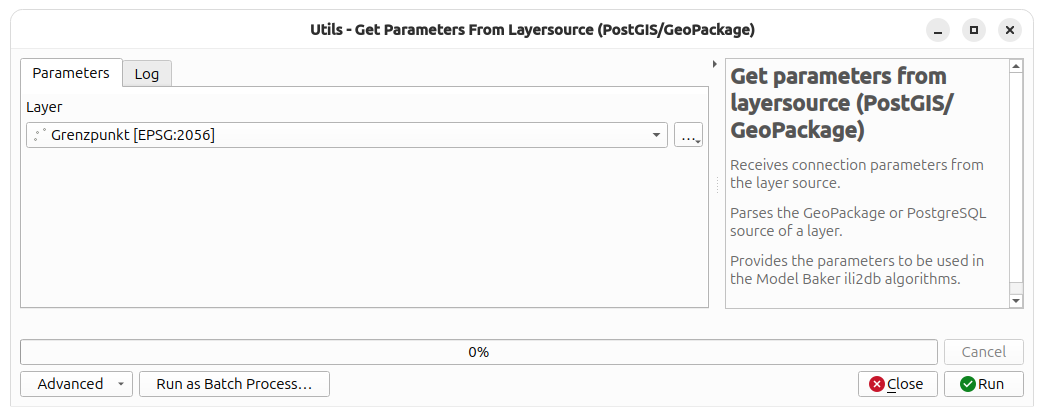
Parses the data source of a layer for the database parameters to be used in the Model Baker ili2db algorithms. This algorithm considers GeoPackage and PostgreSQL sources. It just returns what it finds.
Get parameters from connection
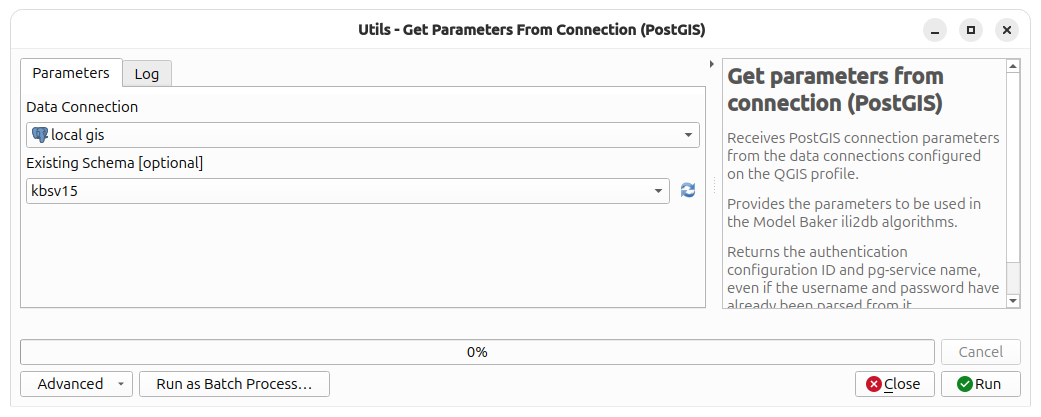
Parses the connection configured in the Data Source Manager for the database parameters to be used in the Model Baker ili2db algorithms. It also returns the authentication configuration ID and pg-service name, even if the username and password have already been parsed from it.
Processing Model Example
Use Case - Export an XTF of a Subset
We have a dataset available as an XTF and want a fully valid subset of it.
In this case we have the water space data of the Canton of Zurich. We want to easily export a subset that only contains the water spaces of a specific water body.
Note
For those who are not in the topic. Water space encompasses areas that secure the natural functions of water bodies, flood protection, and water body use. These data are freely accessible.
The GUI should look like this.
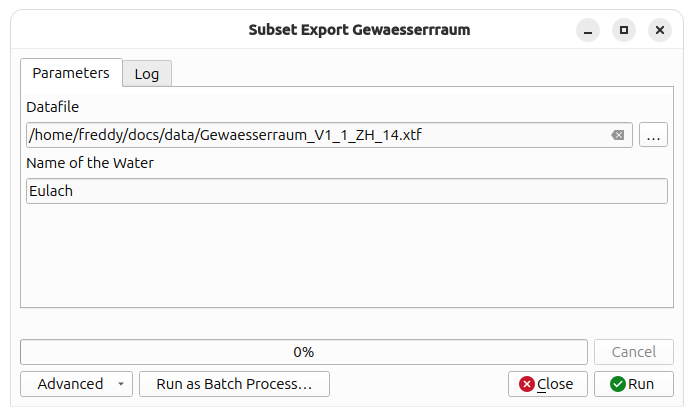
And the result should be an xtf file in the temporary folder.
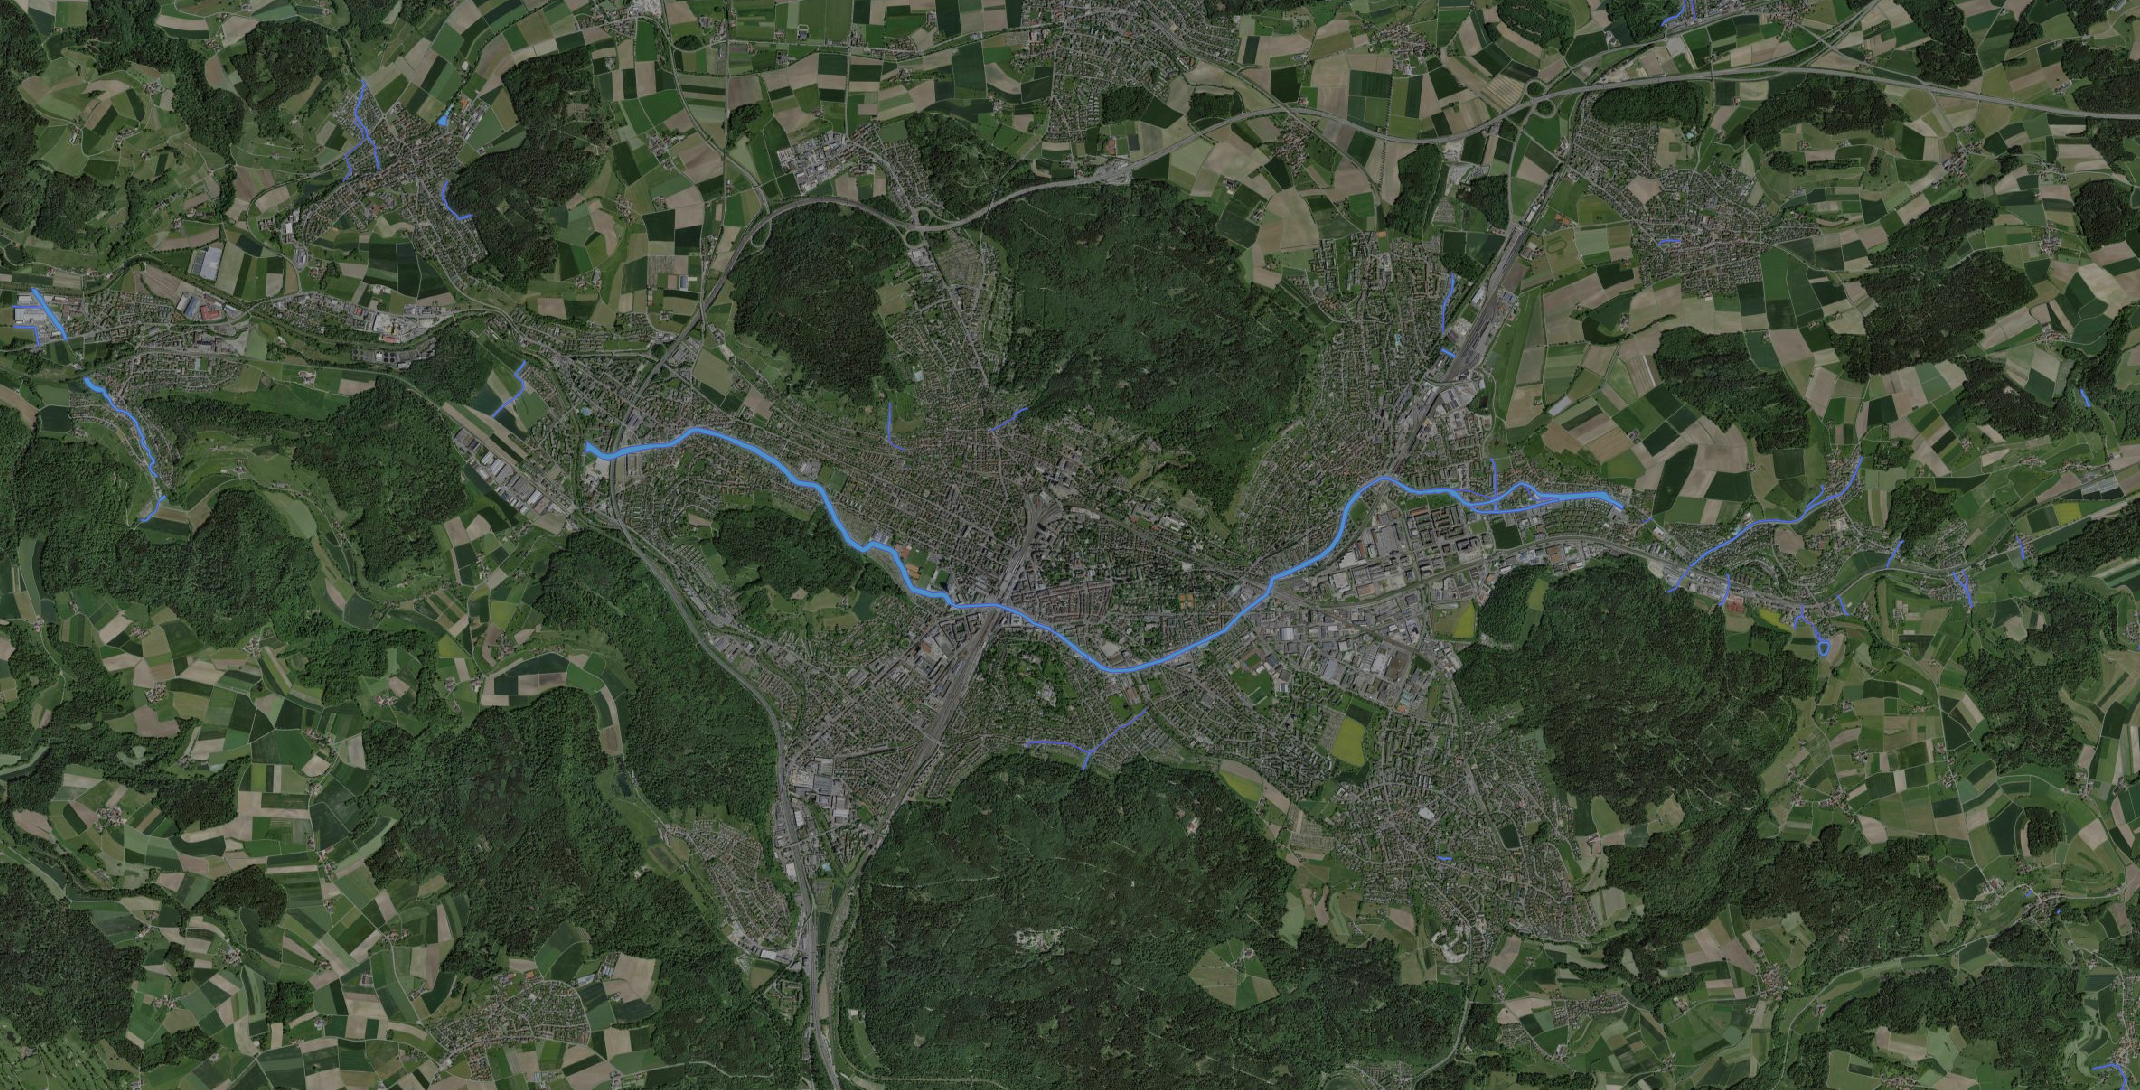
The Processing Model in the following steps does not need any layers in the project. If you still want to show the results as layers, then see the note under Feature Filter. This are the source data around the city of Winterthur.
Build the processing model
Let's create a processing model with the QGIS Model Designer that offers us all the Model Baker algorithms.
We open it in the menu: Processing > Model Designer
1. Import the Model
First we need the data in a GeoPackage. Before we can have that we need to import the INTERLIS model.
For that we need the algorithm Create Schema with ili2gpkg (GeoPackage).
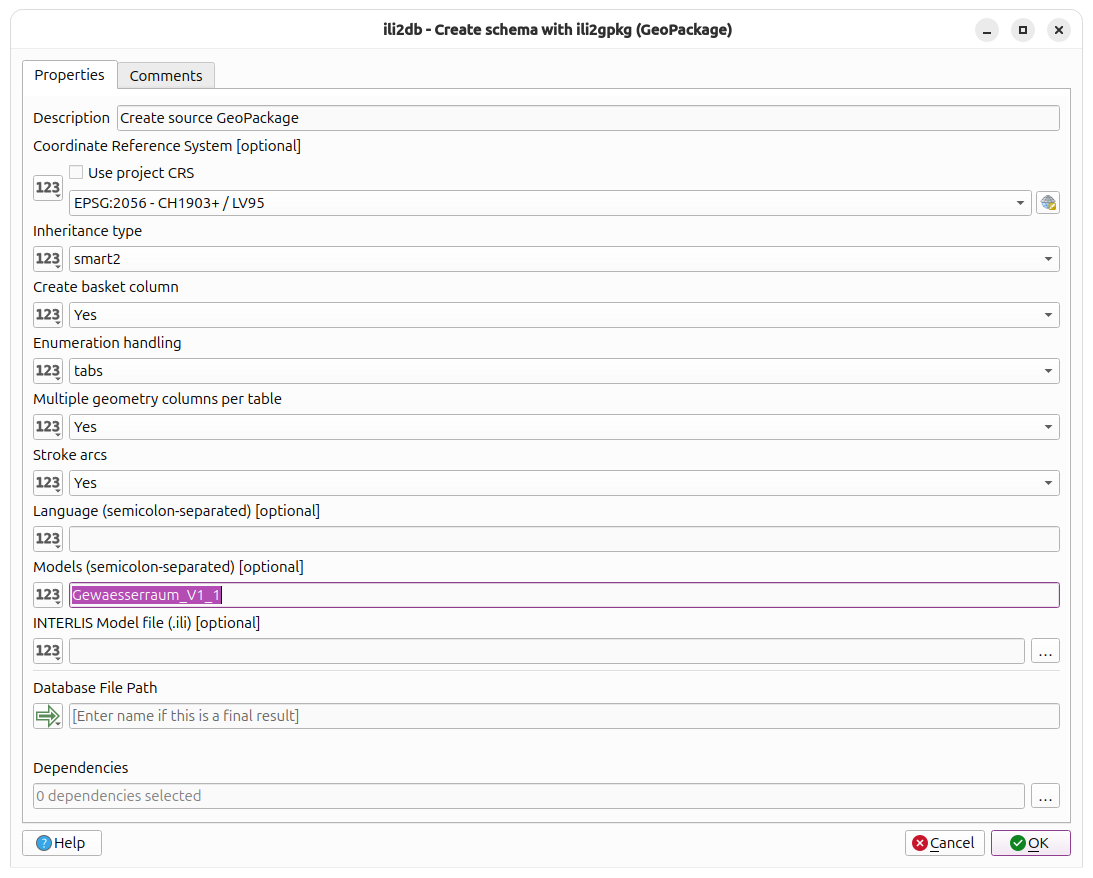
- We name it
Create source GeoPackage - As Enumeration handling we choose
tabs. This makes data migration easier because it stores the enumeration values directly in the field - As Model we enter
Gewaesserraum_V1_1. This will find the model in the official or configured repositories.
2. Import the Data
To select the data from individual sources, we add an Input Parameter of the File/Folder type.
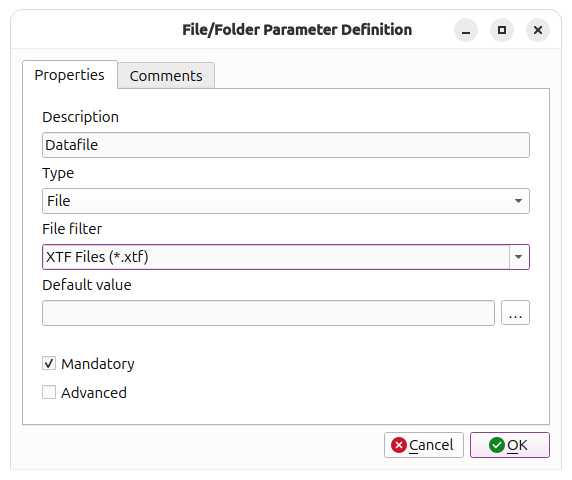
- We name it
Datafile - As File filter we edit it to
XTF Files (*.xtf)to allow only XTF files in the selection
We add the algorithm Import with ili2gpkg (GeoPackage)
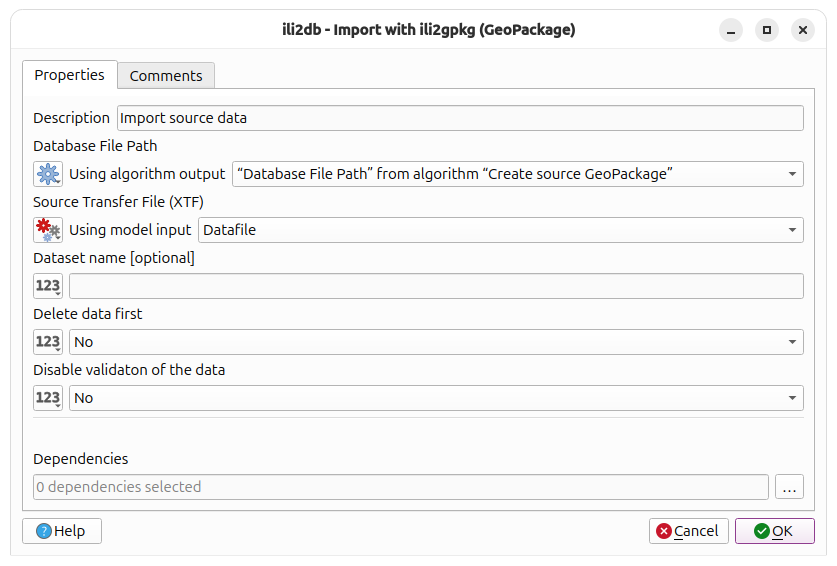
- As the Database File Path we take the algorithm output
Database File Pathfrom the algorithm "Create Source GeoPackage" - The Source Transfer File should be taken from the model input
Datafile.
3. Feature Filter
Now we need to filter the feature. Lucky for us, it's enough to filter only one layer. But you can filter several tables that depend on each other with a Processing Model. It's just more complex and not suitable for a simple example.
We need another Input Parameter to define the water name of the type String.
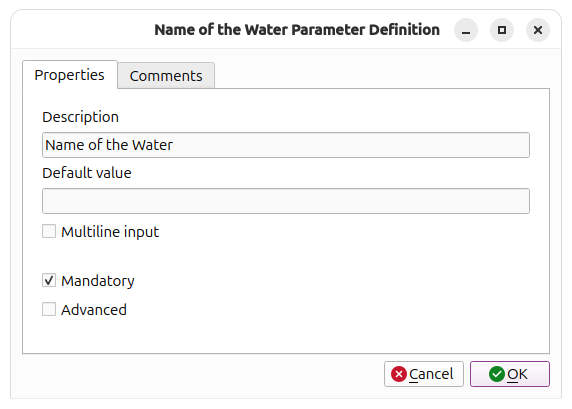
We name it accordingly.
Then we use the QGIS native algorithm called Feature Filter.
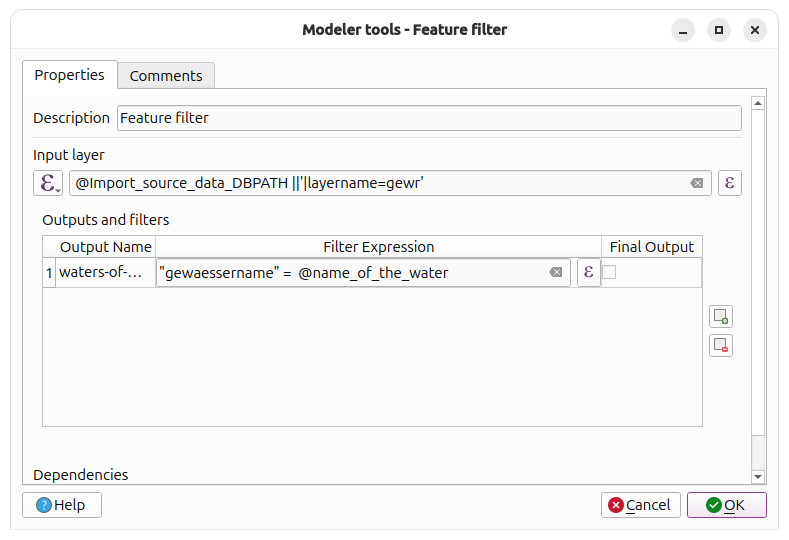
- We define the Input Layer as a pre-calculated value with an expression:
@Import_source_data_DBPATH||'|layername=gewr'. This means we don't have to load the layer into QGIS, but can read it from the GeoPackage (provided by the outputs of the previous algorithms) and append the layername to it. With PostGIS this would work differently. - We add the filter
waters-of-interestand define the filter expression"gewaessername" = @name_of_the_water. "name_of_the_water" is a variable we can use once the Input Parameter is defined.
Now we already have a small Processing Model that would fully work.
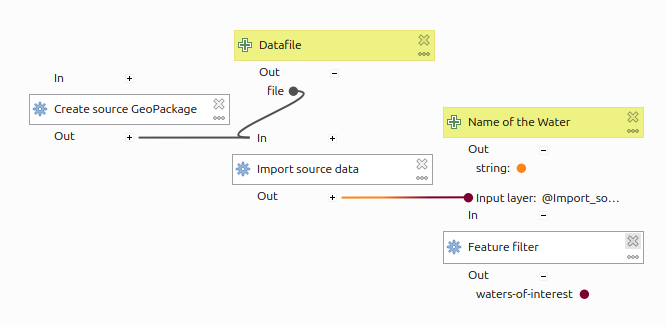
We could define it as Final Output and would receive the water spaces of "Eulach" (or whatever water name we enter) in QGIS.
Note
If you want to check if you do everything right, you can use the algorithm Load Layer into Project and define the layer as a pre-calculated value, like e.g. for the original data layer @Import_source_data_DBPATH ||'|layername=gewr'
4. Import the Model (again)
The plan now is to put the filtered model into a fresh GeoPackage based on the same INTERLIS Model and then export it from there. For this, we need to create a second GeoPackage.
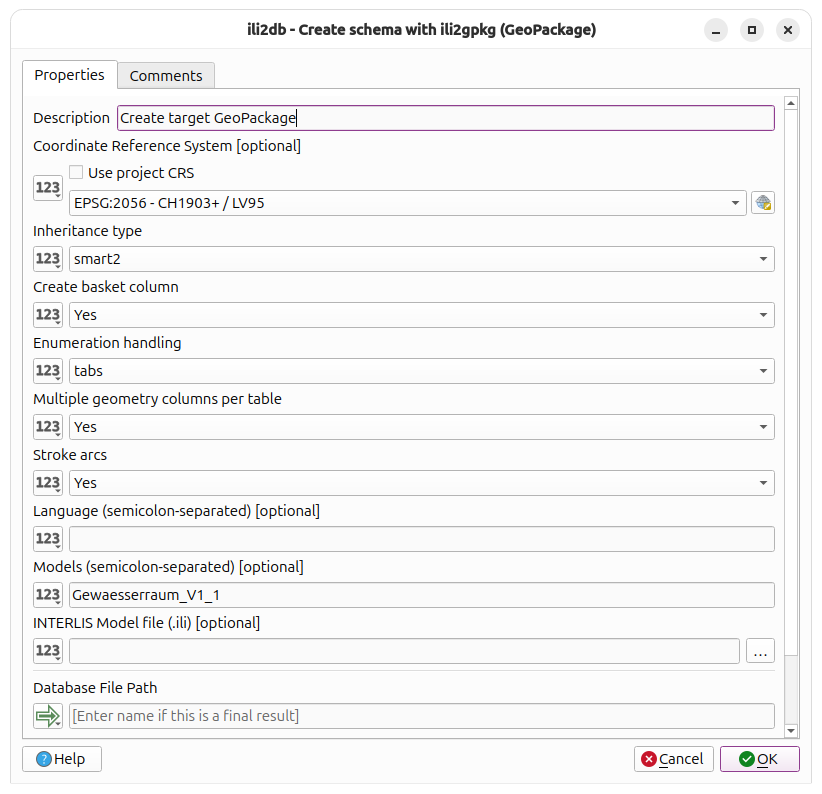
Again we take the algorithm Create Schema with ili2gpkg (GeoPackage).
- We name it
Create target GeoPackage - As Enumeration handling we choose
tabs. This makes data migration easier because it stores the enumeration values directly in the field - As Model we enter
Gewaesserraum_V1_1. This will find the model in the official or configured repositories.
5. Create the baskets
Because we do not import the data we have to create the baskets on the target GeoPackage.
For this we have the algorithm Create baskets (GeoPackage).
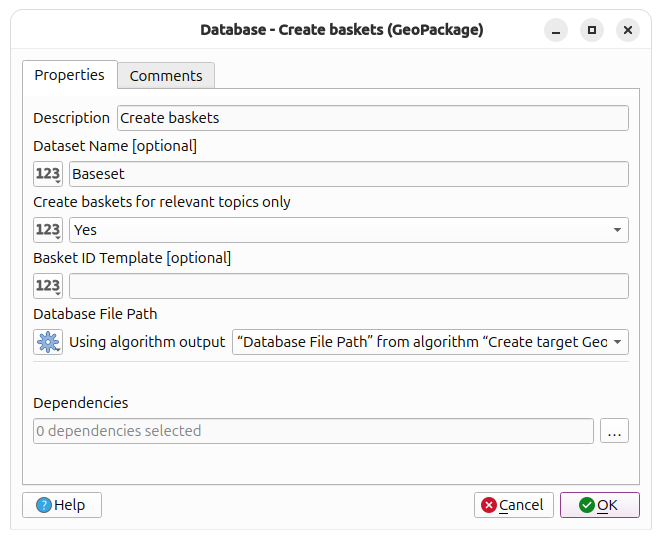
- As the Database File Path we take the algorithm output
Database File Pathfrom the algorithm "Create Target GeoPackage"
6. Refactor Fields
In other models the big work would start now. The re-mapping of foreign keys to other objects or catalogue values. In our model here we only have one issue with foreign keys: the IDs of the baskets
Note
Actually this would not even be an issue on this particular model, because it does not require baskets. But because we already created them, we want to use them.
To have the correct baskets we need to add its T_Id to the filtered data as a foreign key. We do this with the algorithm Refactor Fields.
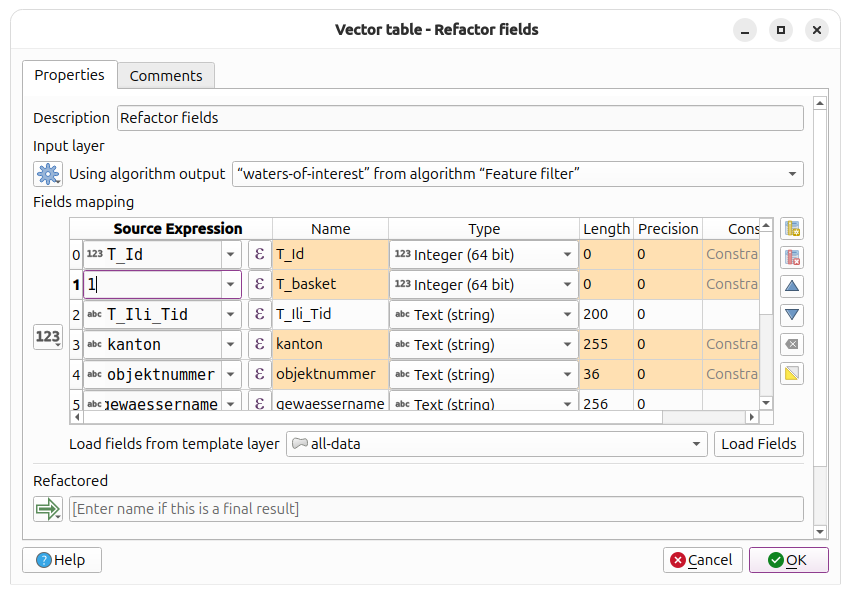
- As the Input Layer we take the algorithm output
waters-of-interest - We can load the fields from a generated layer or enter them manually.
- Now we have to set something for the T_basket field. The simplest would be to enter just
1because in this case we know that it will have thisT_Id, but we could get it with more complex expressions as well, likeattribute( get_feature( 'basket-table', 'topic', 'Gewaesserraum_V1_1.GewR' -- the topic of this class ),'T_Id' )
7. Save the features
Now we have to save the filtered and refactored features to the target GeoPackage.
We use the algorithm Save vector features to file.
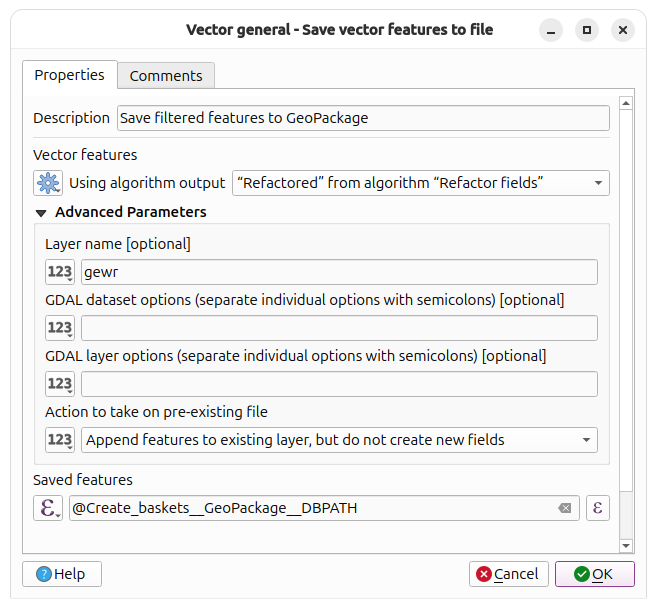
- As the features source we choose the algorithm output
Refactored - In the layer name we have to define the table name. It's
gewr - Then we have to choose the action
Append features to existing layer, but do not create new fields - And the target for the saved features should be our target GeoPackage. This means we take the variable
@Create_baskets__GeoPackage__DBPATHas a pre-calculated value
Now we have the filtered data in an INTERLIS based GeoPackage. The Processing Model looks like this:
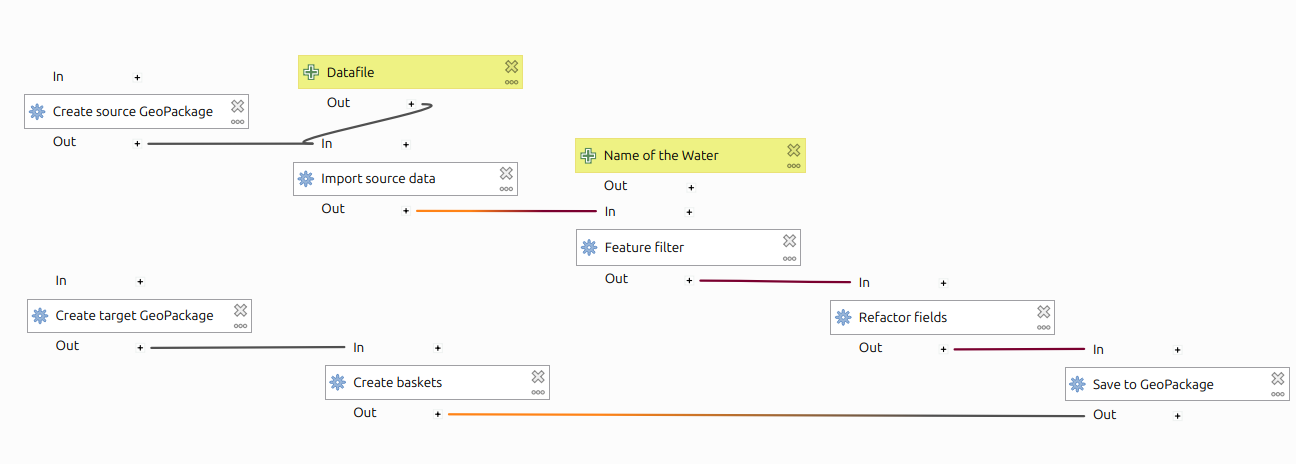
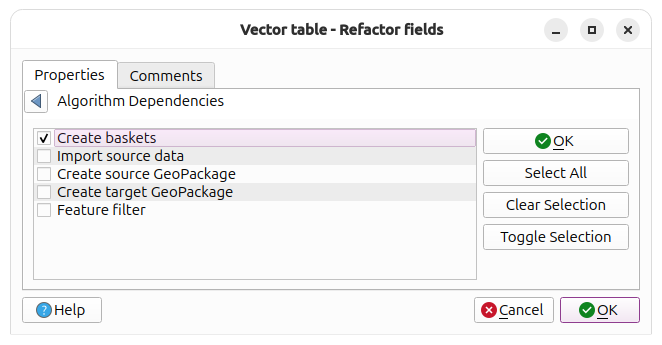
But there is one pitfall. To "Save to GeoPackage" (or if we get the Basket's T_Id with an expression, already in "Refactor fields") we need to be sure the target GeoPackage already exists. It works perfectly now, because it takes longer to import the data of the Canton of Zurich than to create the baskets, but to be sure we introduce a dependency. We do that in the "Refactor fields" algorithm.
8. Validate the subset
Now we want to be sure that our subset is valid. For this we use the algorithm Validate with ili2gpkg.
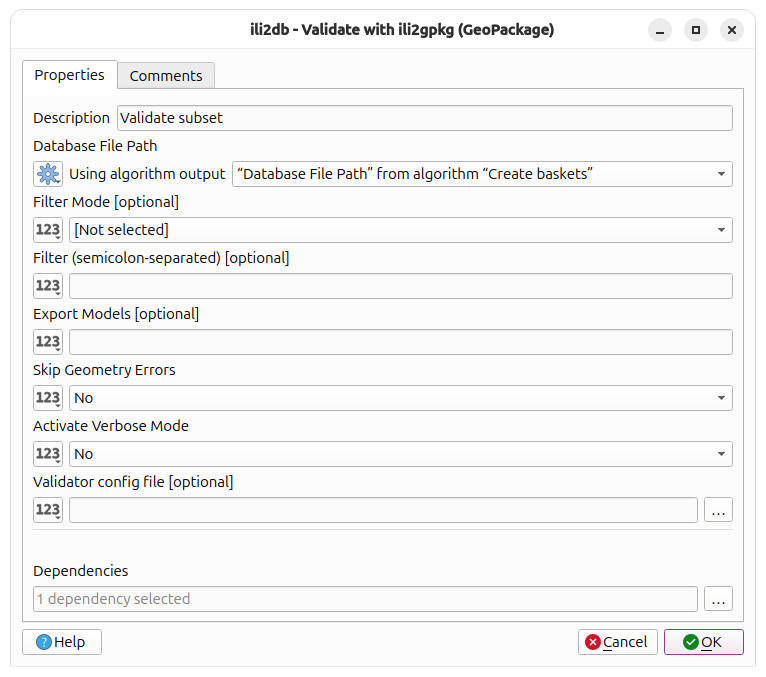
- As the Database File Path we choose again the algorithm output
Database File Pathfrom the algorithm "Create baskets" - And we configure a dependency from the "Save to GeoPackage" (because otherwise it validates the GeoPackage before the new features have been saved)
9. Export the subset
And finally we export the subset using the Export with ili2gpkg algorithm. Of course because of this we would not have needed the step with the validation, except when we want to export the subset even when it's invalid but get the information that it would not be valid.
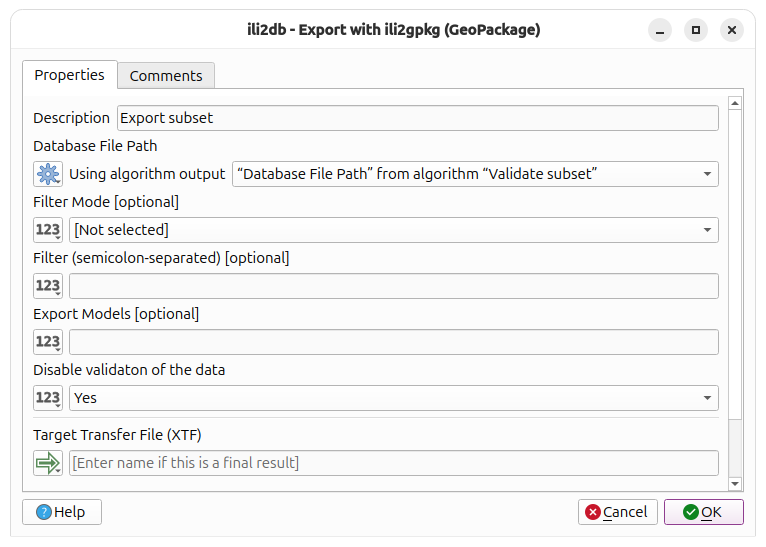
- As the Database File Path we choose the algorithm output
Database File Pathfrom the algorithm "Validate subset"
Result
And this is how it finally looks.
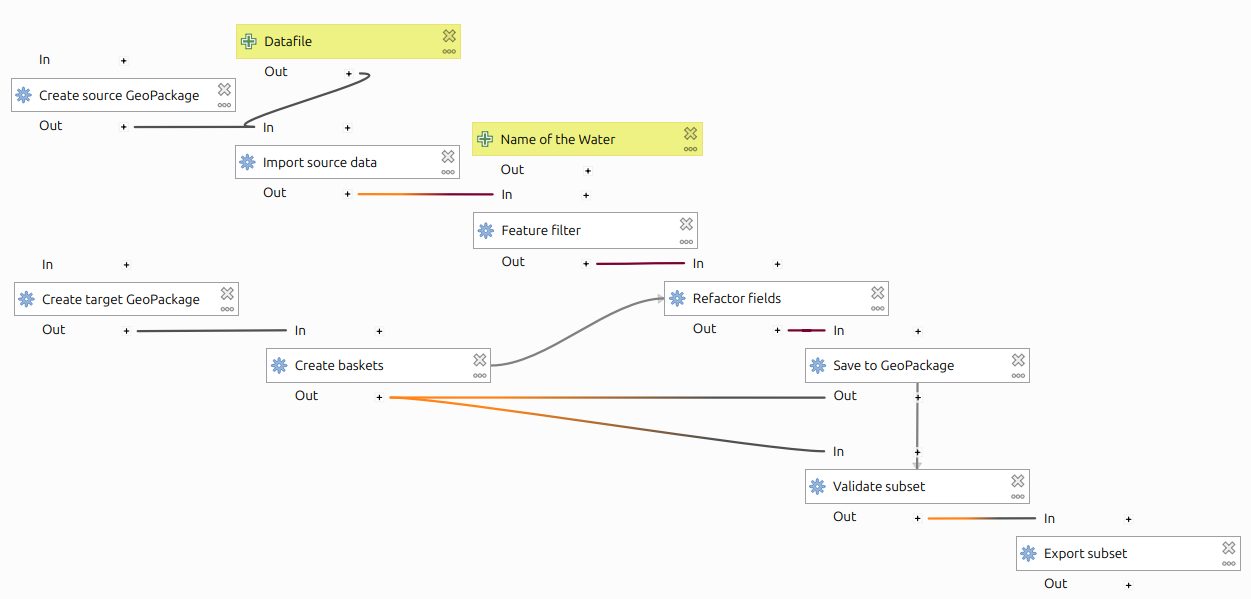
- Create first GeoPackage
- Import the data
- Filter the data to a subset
- Get BID for the subset
- Create second GeoPackage
- Create baskets in the second GeoPackage
- Save the subset into the second GeoPackage
- Validate and Export the subset
- Done
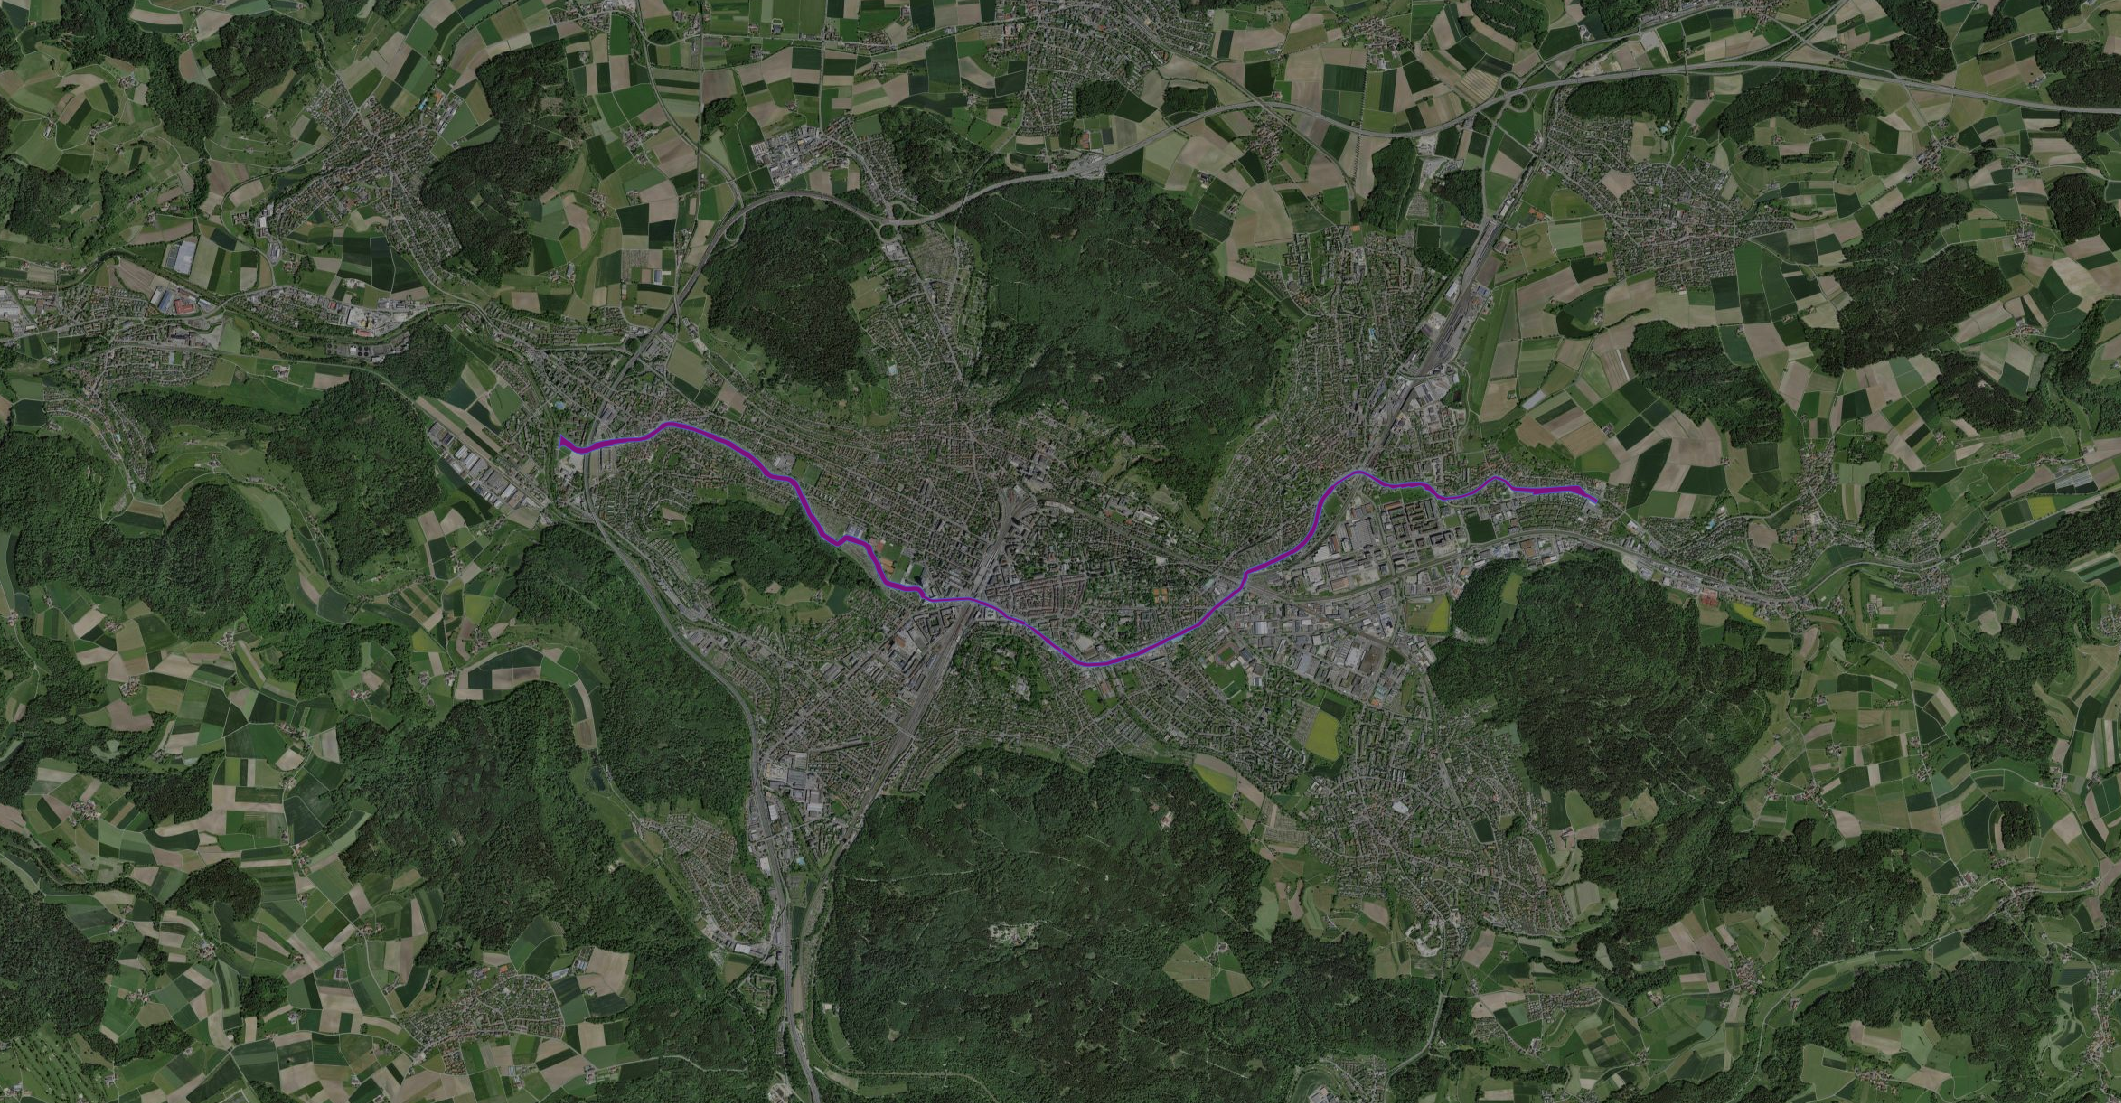
And as a layer it looks like this.
To try it yourself, you can find the data here and model here.